Showing posts with label Canning. Show all posts

Saturday Thoughts...Home Canning Easy Chili with Beans

Home Canning Easy Chili with Beans  
 
After Michelle said she canned her chili recipe to take to work for lunches (she has a small kitchen in her shop), I thought that I had to try it with my easy chili recipe that uses already canned tomatoes, tomato sauce and chili beans in sauce.  I was worried that canning the recipe would make the beans too mushy, but I didn’t have to worry!  I had been freezing the extra servings of this chili, but I liked canning it so much I have already made a second batch!   I canned them in my 10 quart All-American Pressure Canner.  
I use the smaller jars (about 1 ½ cups) in chili mac, tamale bake or chili with hominy or corn, or over fritos, (or topped with fritos); over baked potatoes, or over hot dogs for the two of us or as chili for one.
                     
Home Canned Easy Chili with Beans
  2      pounds  ground beef -- thawed
  1      cup  onion -- chopped
     ½  cup  green pepper -- chopped
  2      15 ounce cans  canned tomatoes -- diced 2 cans
  2      15 ounce cans  canned chili beans in sauce -- 2 cans
  2      8 ounce cans  tomato sauce -- 2 small cans
  5      pints  jars, rings, lids
  2      12 ounce  jars, rings, lids
Thaw beef overnight if frozen, prepare onion and green pepper ahead or use frozen.  
Get out canner, jars, lids and rings and let come to room temperature.
Get out tools:  jar tongs, jar lifter, plastic knife, lid magnet, slotted spoon and ladle, jar funnel, jar filling pan with paper towels, 2 quarter sheet pans lined with paper towels or towels for cooling jars.
Prepare canner with 2 – 3 quarts water; heat with jars to warm them; prepare lids in simmered water, let stand 10 minutes.
Meanwhile, brown beef, green pepper and onion.  Drain if needed.
Stir in remaining ingredients.  Bring to a boil.
After bringing to a boil, pour into five pint jars and two 12 ounce jars, leaving 1" headspace, and filling 3/4 full with solids and finishing with liquid to 1" level.  Can 1 hour 15 minutes at 10 pounds pressure for 1000' altitude.  
2020:  65¢ per serving...$1.30 per pint, 98¢ per 12 ounce jar using sale ingredients

Here are a few recipes to use with your chili with beans. 
 
                    
                                Chili Mac
  1 1/2         ounces  Elbow Macaroni -- or cellentani (1 1/2 ounce)
  1 1/2         cups  chili with beans
  1               ounce  cheddar cheese -- shredded
Cook macaroni 7 minutes, drain.
Combine all ingredients except cheese; mix well.
BRING to boil; cover. Simmer on low heat 5 min., stirring occasionally, or until macaroni is done. Serve topped with cheese.
Or cook macaroni, drain and add to 1 1/2 cups hot chili.  Serve topped with cheese.
                 

        Tamale and Chili Bake
  1 ½    Cups  chili with beans
  2        Canned Tamales -- 2 Tamales for recipe (Freeze the extras)
  3        Tablespoons  Onion -- chopped
  1        ounce  Shredded Cheddar Cheese
Pour chili into two greased individual oval casseroles. Unwrap tamales and place on top of sauce.  
Top with onion and cheese and bake at 350° until bubbling hot, about 20-30 minutes.
                 

  Chili with Hominy
Combine 1 ½ cups Chili with beans and ½ can golden hominy, rinsed and drained; heat through.  Serves 2.  (You can substitute whole kernel corn for the hominy.)

Saturday Thoughts...Using Holiday Sale Foods and Leftovers


A couple of cookbooks that I use frequently have good information on using leftovers and excess food that needs to be used soon.
Our Mother’s 1946 Better Homes and Gardens Cook Book that I treasure.  It is notable because although it is a “red plaid” cookbook, it is surprisingly thin, with only 200 or so pages.  My own first copy of the cookbook is from 1968, and probably weighs twice as much. 
But what really interested me is that this 1940’s version is the only cookbook I’ve seen with an entire chapter devoted to “Leftovers”. 
The other cookbook that has greatly influence my attitudes towards cooking and planning meals is The More-with-less Cookbook.  I like the book as much for the recipes, of which there are plenty, but also for the suggestions, and the thoughts and philosophy about using and enjoying food without waste.  After 25 years, when I read this book again, I find it has greatly influenced my own attitudes about cooking and choosing what to cook.  Many of the recipes were contributed by church members and missionaries in many countries, so there is a multicultural feel to the recipes as well.  One of my favorite features of this book are the suggestions for using any leftovers or excess food, at the end of each chapter. 
     This is pretty relevant during the holidays, when we probably cook too much and have food left that we don’t know what to do with.  I also buy some of those holiday specials and can or freeze them to use later.
Bottom left, clockwise:  Roasted turkey, freezer mashed potatoes, canned cranberry sauce, canned turkey, canned turkey stock  

         Some ways to keep holiday sale items for later use...

Take an hour or so and go through your holiday leftovers.  Package them in useful sizes for the freezer or can them to use later, or put them on your menu to use quickly.   Make a list of what you put in the freezer to use that quickly too; I also keep them in a separate plastic box so I don't have to search for the leftovers I want to use.      

Fall Canning 2019

L-R:  Split Peas, Red Lentils, Kidney Beans, Black Beans, Great Northern Beans. 
In preparation for defrosting my free-standing upright freezer before winter, I spent a few days canning.  I had several nice, large smoked ham shanks I had bought on sale and some salt pork and ground beef that would reduce the amount of food I would have to find a place for while defrosting the freezer.
I canned one recipe a day; and left my canner, stockpots, jars and lids, etc. in my kitchen until my canning was completed.  I keep my canners, jars, stock pots, etc. in a cupboard in my warm attached garage right next to the kitchen door when not in use.
I had everything except fresh vegetables (onions, celery, carrots) for these recipes in my freezer or pantry stock.  I purchase bulk dry beans, lentils and split peas at the Dutchman’s in Cantril, Iowa, a Mennonite store serving the Amish and Mennonites in that area.  They are superior quality and the price is right.  I do repackage them from plastic bags to half-gallon Mason jars for long-term storage. 
Here’s what I canned:


From the Garden...Home Canned Split Pea Soup

Click on photo to enlarge it
This soup is one of our absolute favorites to can.  Perfect to serve on a busy day; just add bread or crackers and some fruit.    I make sure I never run out…I usually double the recipe so I cut my mess in half. 
To get a head start, I assemble my canners, clean jars, other equipment, and cut up my veggies and put them in the refrigerator the night before.    I have to ask for ham shank at my grocery store meat counter; if you can’t find one, try ham hocks or just 2 cups of ham, diced.  
You don’t have to soak the peas, a real timesaver.  I actually don’t add the vegetables to the pea mixture as the Ball recipe calls for; I add them raw to the jars, and then cover the meat and veggies with the hot pea soup mixture.   Be sure you remove bubbles from the mixture if you do it this way, by stirring it with a plastic knife or chopstick.   
Home Canned Split Pea Soup
  1          Pound  Split Peas -- dried
  2          Quarts  Water
  1          Ham Shank-- (1 1/2# shank) (2 cups chopped meat)
  3          Ounces  Onion -- chopped
  4          Ounces  Celery -- 1/2" slice
  8          Ounces  Carrots -- 1/2" slice
  1          Bay Leaf
Combine the  peas, water and hock; bring to boiling.  Cover and simmer 1 hour, remove bay leaves and hock; trim off and chop meat and return to soup, (or keep it to divide among your jars).  Meanwhile, add vegetables (or save them to divide among the jars) and continue cooking 15 minutes or until peas are just tender.  The consistency will be thin.
Wash jars, heat in boiling water for 10 minutes, keep in simmering water until filling.  Heat lids in hot water for 10 minutes until ready to use.  DO NOT BOIL LIDS.
Divide ham and vegetables among jars if they are not in your mixture.  Pour hot mixture into hot jars, leaving 1-inch head space.  Remove bubbles with plastic knife and wipe jar rim carefully with hot wipe before sealing.  Cover and seal, place in pressure canner (with about 3 quarts simmering water), exhaust steam 10 minutes, process in pints 1 hour and 15 minutes at 10#.  Let pressure drop of own accord (30 minutes), open canner, remove jars to clean towel and let cool and seal, setting apart to allow air to circulate.  Remove rings and wash jars carefully.
Equipment:  Stock pot or Dutch oven, chopping board, pressure canner, 13 x 9" pan with paper towel for jar filling, jars, lids and rings, funnel, lid magnet, jar lifter, plastic knife, 2 cup measure for lids, 4 quart measure for water, clean towels, stock pot to keep jars warm if necessary.
To serve, add 1/4 cup water to emptied jar, rinse jar and add to soup.  If desired, add some shredded fresh spinach just before serving.  Heat and eat.  Each jar makes two 1-cup servings.
Cost in 2014:  75¢ per pint or $4.47 per canner load.
  "2006 Ball Blue Book"
Yield: 6 Pint Jars

Tomato Garden Juice Blend


 Don and Bonnie tried several new-to-them recipes for tomatoes last summer; they shared this vegetable juice blend that we liked even better than canned V-8 juice.  They used a food mill for making puree.     They were able to use all garden produce for this recipe except celery.  You must use bottled lemon juice so it has a consistent acidity for water-bath canning.  They raise Roma tomatoes for products like this so as they are meaty and not so watery. 
Delicious…and too good to use for cooking…we used it all as a beverage.
            
Tomato Garden Juice Blend
  22            pounds  tomatoes
     3/4           cup  carrots -- diced
     3/4           cup  celery -- chopped
     3/4           cup  green pepper -- chopped
     1/2           cup  onion -- chopped
     1/4           cup  parsley -- chopped
  1                 tablespoon  salt -- optional
                      bottled lemon juice
Wash tomatoes; drain. Remove core and blossom ends. Cut into quarters. Combine tomatoes and vegetables in a large saucepot; simmer 20 minutes, stirring to prevent sticking.
Juice tomatoes in a food processor or food mill. Strain juice to remove peels and seeds. Stir in salt, if desired.
Heat juice 5 minutes at 190°F. Do not boil. Add 1 tablespoon bottled lemon juice to each pint jar, 2 tablespoons bottled lemon juice to each quart jar. Ladle hot juice into hot jars, leaving ¼-inch headspace. Adjust two-piece caps.
 Process pints 35 minutes, quarts 40 minutes, in a boiling-water canner.  Water must cover jars by 1 inch.
14 pints or 7 quarts (approximately)
  "Ball Blue Book"

  "7 quarts or 14 pints"

Home Canned Cherry Pie Filling

Don and Bonnie have a really nice cherry tree that her mother planted on their homestead.  The cherries are perfect for jam, pie filling or just canned cherries.  Bonnie brought her beautiful, delicious pie to our family reunion this summer; and let me get a good photo before we cut into it. (Don finished making the pie, as Bonnie cut her hand - not a good idea there!, so it really is Don and Bonnie's pie in the photo.)
This recipe, from the "Complete Guide to Home Canning," Agriculture Information Bulletin No. 539, USDA”, makes really good pie filling, and is the one they used.  They have also made the same pie filling and have frozen it until it’s needed.  Don uses a cherry pitter like the one in the photo; beats any other method, trust me.
We can buy clear jel in our area at a couple of Amish groceries.

Cherry Pie Filling
Quality: Select fresh, very ripe, and firm cherries. Unsweetened frozen cherries may be used. If sugar has been added, rinse it off while the fruit is still frozen.
Procedure:  Rinse and pit fresh cherries, and hold in cold water. To prevent stem end browning, use ascorbic acid solution.

For fresh fruit, place 6 cups at a time in 1 gallon boiling water. Boil each batch 1 minute after the water returns to a boil. Drain but keep heated fruit in a covered bowl or pot. Combine sugar and Clear Jel® in a large saucepan and add water. If desired, add cinnamon, almond extract, and food coloring. Stir mixture and cook over medium high heat until mixture thickens and begins to bubble. Add lemon juice and boil 1 minute, stirring constantly. Fold in drained cherries immediately and fill jars with mixture without delay, leaving 1 inch headspace. Adjust lids and process immediately according to the recommendations below.
Ingredients:


1 Quart
7 Quarts
Fresh or thawed sour cherries
3-1/3 cups
6 quarts
Granulated sugar
1 cup
7 cups
Clear Jel®
1/4 cup + 1 tbsp
1-3/4 cups
Cold water
1-1/3 cups
9-1/3 cups
Bottled Lemon Juice
1 tbsp + 1 tsp
1/2 cup
Cinnamon (optional)
1/8 tsp
1 tsp
Almond extract (optional)
1/4 tsp
2 tsp
Red food coloring (optional)
6 drops
1/4 tsp


Process Time at Altitudes of
Style of Pack
Jar Size
0 - 1,000 ft
1,001 -3,000 ft
3,001 - 6,000 ft
Above 6,000 ft
Hot
Pints or Quarts
30 min
35
40
45

Cherry Pie
1 quart Cherry Pie Filling
1 teaspoon milk
1 teaspoon sugar
Heat oven to 425°F. Make pie crusts as directed for Two-Crust Pie, using 9-inch glass pie plate.
Spoon pie filling into crust-lined plate. Top with second crust; seal edge and flute. Brush top crust with milk; sprinkle with sugar. Cut slits in several places on top crust.
Bake 40 to 45 minutes or until crust is golden brown. After 15 to 20 minutes of baking, cover crust edge with strips of foil to prevent excessive browning. Cool at least 1 hour before serving.

Butter Homemade Cultured

 The February 2015 issue of Southern Living magazine had a recipe for making butter. After reading and thinking about it I decided I needed to try it.
 I am happy to report it turned out very well. The directions were clear and it was really quite easy to make. Much easier than churning butter in a glass churn that I remember doing as a kid. We didn’t do it often as there was a good dairy in our hometown and you could buy great butter from them.
 However, this is a cultured butter not a sweet cream butter, more on the order of Kerry Gold butter from Ireland. Lyle thought it was a lot like the butter his mother made and John thought the buttermilk was good.
 This made 17 ounces of butter and a pint of buttermilk and the cost the day I bought the ingredients was $5.10. That includes the butter and the buttermilk. Two for one in this recipe. If you like to try different things as I do, you need to try this at least once.
Fresh Butter and Buttermilk
4 cups of heavy cream (whipping cream works)
1 cup store-bought buttermilk
 Heat 4 cups of heavy cream in a saucepan over low heat until a thermometer registers 70°F. Pour cream into a large bowl and stir in the one cup of buttermilk. Cover tightly with plastic wrap and let stand at room temperature for 24 hours keeping it out of any drafts. (If you are not going to be using your oven this works well. I hung a towel over my oven door so I would not turn the oven on and forget it was in there.)
 The next day, process the thickened mixture in a food processor 5 to 8 minutes (mine was butter in 4 minutes, this will vary) until small bits of butter are forming. Pour through a fine sieve into a large bowl. Let stand to drain for 10 minutes pressing on it occasionally to drain well. Use the buttermilk at once or store in a glass jar with lid for up to 3 weeks. Run cold water over the butter in the sieve; squeeze to form ball. 
 Knead butter in ice water until water becomes cloudy. Drain, repeat until water remains clear. Knead in ½ teaspoon kosher salt. Shape into a disk; wrap and chill up to 3 weeks.

Do keep in mind that this butter has a tang to it which their recipe also says.

Slow Cooker Beef Stock

Clockwise from top left:  canned stock in 12 oz. jars, starting to fill slow cooker,
Roasted vegetables and bones, ready for roasting
 My brother-in-law, Don, gave us some really meaty soup bones from their last processed homestead-raised beef.  To make it easier for me, I roasted the bones and vegetables like I usually do, then placed them in the slow-cooker to cook unattended instead of a stock pot on the stove.
I canned my stock the next day; if you want more detailed directions for canning, check here.  It's perfectly good to simply freeze the stock in the size portion you usually use.   
I removed the meat from the bones after 5 hours, so we could still use it for soup making.  8 hours makes it just too done. 
I also save the beef fat and use it for cooking, just like Grandma did.  It’s wonderful for making beef gravy, instead of using other fats; as it has all that good beef flavor.  You can freeze it in portions the right size for the gravy recipe you usually make.               

Slow Cooker Beef Stock
  2        Tablespoons  Tomato Paste
  5        Pounds  Meaty Beef Marrow Bones
  2        Stalks  Celery -- 2" pieces
  1        Large  Carrot -- 2" pieces
  1        Large  Onion -- peeled, 8 wedges
  2        Each  Bay Leaves
  1        Tablespoon  Peppercorns
  6        Cups  Water
  1. Preheat oven to 500°.
  2. Brush tomato paste evenly over bones, place in a large roasting pan.  Add celery, carrot and onion; bake for 30 minutes at 500°.
  3. Place bones and vegetables in a 6 quart slow cooker; add seasoning and water.
  4. Cook on low for 8 hours.  Optional: remove meat from bones after 5 hours and save for another use.  Return bones to cooker and continue cooking for the total 8 hours.
  5. Strain stock; discard solids.  Cover and chill overnight. (I don't strain mine through a cheese cloth, I don't mind having some of the tiny bits of meat and vegetables in my stock.  My strainer is fairly fine, however.)
  6. Remove solid fat from the surface; place in a covered jar and save to use for cooking and gravy making.
  7. Freeze stock or can it.
  8. To can; reheat stock.  Pour into hot jars, leaving 1" headspace, adjust lids and process in a pressure canner for 20 minutes at 10 pounds pressure.

Yield:  "9 Half Pints"

From the Garden...Home Canned Beets

 If you have beets growing or can buy them at a Farmers Market like I do, try canning them. They are quite simple to can and you can then use them later on for beet pickles, or as a veggie or in a relish. The only warning I have is that beet juice stains so I would wear gloves if you don’t want red hands and a apron to keep your clothes clean.
Keep in mind that beets are a low acid vegetable and must be pressure canned not water bathed. 
 The directions I use are from the Ball Canning Book and I would recommend buying one if you do not have one. It has the recipes for other ways to can beets as well.
 If you are not sure if you are doing it right check out our posts on canning or again buy the Ball Book and read the introduction to canning.

Canned Beets
2 to 3 pounds red beets per quart (Salt Optional)
water
  Wash Beets and drain. Leave 2 inches of stem and tap root on. Put in large kettle, cover with water and  heat to boiling. Boil till skins slip off easily. Remove skins, trim top and bottom and slice, dice or leave whole if small. 
  Pack hot beets into hot jars leaving one inch head space. Add 1/2 teaspoon salt to pint jars and 1 teaspoon to quart jars if using salt. Ladle boiling water over beets leaving 1 inch headspace. Remove air bubbles, a plastic knife works well. 
Adjust two piece lids just until finger tight. 

  Process pints 30 minutes and quarts 35 minutes at 10 pounds pressure in a pressure canner starting timing according to the directions with your canner. Let pressure drop on its own. When you remove them,  let cool and then check that they all sealed. Any that did not seal can be stored in the refrigerator and used. Remove rings carefully, wash jars and store in a dark cool (not cold) place.

Home Canned Pork and Beans in Tomato Sauce

Top L, counter-clockwise:  Heating beans in stockpot with strainer,
Bringing sauce to a boil in microwave, enjoying our beans with a sandwich,
filling jars with beans and pork, finished product
Although Myrna and I are fans of Boston style baked beans, my husband likes what he calls “pork and beans”, meaning the tomato sauced version of baked beans.  So he helped me can these beans just for him.   We usually can ours in half-pints, so we don’t have leftovers for just the two of us.  You can also use regular sugar instead of brown sugar.  My husband actually prefers Great Northern beans in this and no cloves...your choice.           
Home Canned Beans with Pork and Tomato Sauce
  4               cups  Navy Beans -- about 2 pounds  
  4               cups  tomato juice
  1               cup  chopped onion -- 6 ounces
  3               tbsp  Brown Sugar -- packed
  2               tsp  salt
     ¼            tsp  cloves (optional)
     ¼            lb  salt pork -- cut into enough pieces for your jars
Cover beans with cold water; let stand 12 to 18 hours in a cool place.
Place 6 clean pint or 13 clean 1/2 pint or 3 quart mason jars on rack in pressure canner; add water and heat jars to a simmer (180°F/82°C). Set screw bands aside; prepare lids according to manufacturer's directions.
Drain beans; cover with boiling water by 2 inches; boil 3-5 minutes. Remove from heat; let stand 10-15 minutes; drain. Combine tomato juice, onion, sugar, salt and spices; heat to boiling (I use a 2 quart measuring cup in the microwave).
Pack 1/2 cup (250 ml) beans into a hot half pint jar or 1 cup into a hot pint jar. Top with a piece of pork; fill jar 3/4 full with beans. Ladle hot tomato sauce to cover beans to within 1 inch (2.5 cm) of top rim (headspace). Using nonmetallic utensil, remove air bubbles. Wipe jar rim removing any stickiness. Adjust lids. Repeat for remaining beans, pork and sauce, adding to canner filled with simmering water on the rack.
When canner is full, adjust water to level as directed by canner manufacturer. Lock canner lid in place and follow manufacturer's heating instructions. Vent canner-allow steam to escape steadily-for 10 minutes; close vent.
When canner reaches the pressure appropriate for your altitude (10# for up to 1000' or 15# for over 1000'), begin counting processing time. Process for time indicated:
Jar Size                        Time
pint or half pint        65 minutes
quart                          75 minutes
When processing time is complete turn off heat.   Allow canner to stand undisturbed until pressure drops to zero. Wait 2 minutes, and then remove cover, tilting it away from yourself. Remove jars without tilting. Cool upright, undisturbed 24 hours; DO NOT RETIGHTEN screw bands. After cooling check jar seals. Sealed lids curve downward. Remove screw bands; wipe and dry bands and jars. Store screw bands separately or replace loosely on jars, as desired. Label and store in a cool, dark place.
  "Adapted from Bernardin"
Yield:   "6 Pints or 13 Half Pints"

Canning or Freezing Ground Beef...Home Canned or Frozen Hamburger Mix

This is a recipe that I have canned for years.  It is a combination of a couple of recipes from the "Farm Journal Thrifty Cook Book" from 1974 and the “Farm Journal Freezing and Canning Cook Book” from 1964.   I like to can it to have it ready on the shelf, to use with no thawing, whenever we want a quick meal.  I also like making the cooking mess one time for a number of meals.  
It can also be frozen in freezer bags or containers.  I can it in half pints for the two of us; double the recipe to can 7-8 pint jars.  A pint jar is 2 cups of meat mixture, a half-pint is about 1 cup.
It can be easily doubled, and I have used either tomato paste and water, or tomato sauce and water, or even plain tomato juice for the canning liquid.  We like the celery in this mixture, if you leave it out, double the onion, or have a smaller yield or follow Ilene Jones suggestion and substitute green peppers, diced.
The chili sauce is my personal addition, it is certainly optional.  Actually, I add whatever other seasoning I want when I use the mix; the taste is fresher, and the mix is more versatile.  I can use it in either Italian or Mexican-flavored dishes that way. 
The rest of the week and next week, I'll share some of the recipes for using this mix.                

                Hamburger Mix - 2# beef
  1             cup  Celery -- finely chopped  
  1             cup  Onion -- finely chopped
  2             pounds  Ground Beef
  2             teaspoons  Salt
     1/4      teaspoon  Pepper
     1/4      Cup  Chili Sauce (optional)
  12           Ounces  Tomato Paste -- more or less
  1 1/3      Cups  Water or broth from mixture
 Or Substitute for Tomato Paste and Water the Tomato Sauce and Water Below
  15            Ounces  Tomato Sauce
    1            Cup  Water or Broth From Mixture
Cook beef in large kettle until red color disappears, don't break up too much.  Drain broth and skim fat if necessary, measure and add water to yield enough liquid.  Add other ingredients to beef and bring to a boil.
Prepare lids according to manufacturer's directions.
Divide mixture among 7 hot half pint jars with 1" headspace. Remove bubbles with plastic knife and wipe jar rim carefully with hot wipe before sealing.  Cover and seal, place in pressure canner (with 2-3 quarts simmering water, check your canner book for amount for your canner), exhaust steam 10 minutes, process in pints or half pints 1 hour and 15 minutes at 10# at 1000’ or less altitude.
Let pressure drop of own accord (30 minutes), open canner, remove jars to clean towel and let cool and seal, setting apart to allow air to circulate.  Remove rings and wash jars carefully.  Store in a cool, dark place.
Can also be canned in pint jars for 75 minutes or in quart jars for 90 minutes, or frozen.  Above 1000' use 15# pressure.  
A half pint of mix contains ¼ pound of ground beef, or a ½ pound in a pint.
Yield:  "7 Half Pint Jars or 3 pints and a half pint”


Use in recipes, or heat the mix and spoon between split buns.  Also can be spread over horizontally sliced French bread, topped with Italian seasoning and  mozzarella cheese and baked 20 minutes for French Bread Pizza.  
Use it in any recipe you would brown ground beef and a little onion for, and simply continue with the recipe, substituting a half pint for 1/4# ground beef or a pint for a 1/2# of beef.  Use several jars if you need a larger amount.


Cheeseburger Cup Muffins


Iowa Spanish Rice


Beef and Bean Burritos


Chili Mac


Chili and Beans


Hamburger Pie


Taco Pasta Salad


One Pan Spaghetti


Easy Pantry Chili


Cheeseburger Soup


Skillet Macaroni Lasagna

Choosing a Pressure Canner

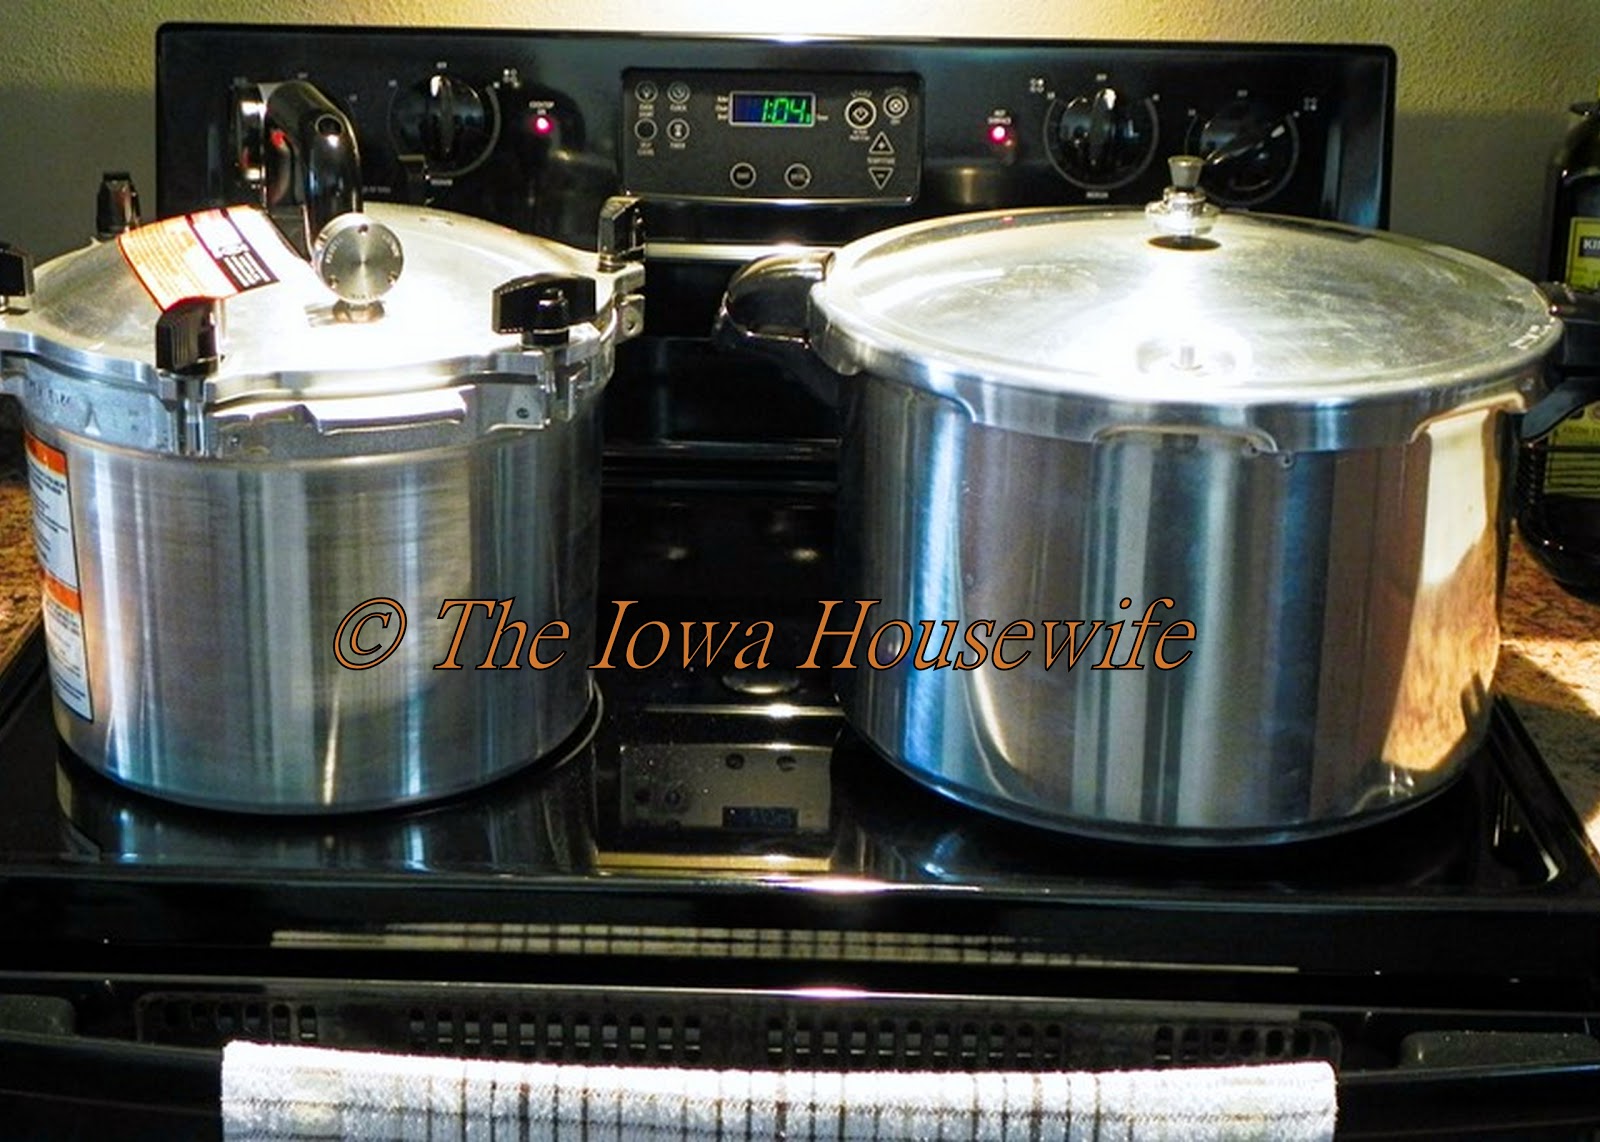
Left:  All American 10 quart Canner,
Right: Presto 16 quart Canner
I’ve been asked more than once about what kind of pressure canner to buy.  Our mother had an early pressure canner back in the fifties, and I’ve been canning or helping can with one ever since.  Her early canner, from Montgomery Wards, which Myrna still has and uses, did need lid gasket replacements several times; I have only replaced one in 50 years.  Apparently the materials are less stretchy today and don't seem to get dried out and cracked as quickly.
Pressure canners are a must if you can meat, fish, poultry, dry beans and vegetables or other low-acid foods; and these products are the ones I can the most.  I like having jars of good food ready to use without thawing and it takes a load off my small freezer.
Don’t substitute a “pressure cooker” for a canner, it heats up too quickly and cools down too fast to meet the processing requirements for your recipe.  You can tell if it’s a pressure cooker; it is 8 quart or less capacity, and doesn’t have variable 5-10-15 pound weights.  The smallest CANNER available now is an All American 10 quart, which I have and like, it has both a dial and variable weight.  I use it to can smaller amounts, and as a second canner when I have more than my Presto will hold.  Some large canners don't have variable weights either, but have a pressure dial.  
I used to have a Presto 23 quart…it got too heavy for me to handle, and I no longer double-stack jars as I did when I canned larger quantities and had help.  I never have felt that having the bottom jars already cooking while I filled the top row was a good idea.  Because of that, I use single-stack canners.  If you can a lot and have help, the canners large enough to double-stack may be just the ticket.
Left:  Stainless Steel Stockpot
with rack for water bath canning;
Right:  Mirro 12 quart Pressure Canner
I have several pressure canners of different sizes, and I often can with two of them going, one after the other.  I now have an All-American 910-10, a 10 quart capacity and a Presto 16 quart capacity canner purchased from Walmart. Up until last year, I also had a newer Mirro 12-quart capacity canner.  
All of them have "jiggler" weights, which I prefer, because I don't want to be tied to watching a dial when I can listen instead. The larger Prestos have dial gauges and the weight is not calibrated for 5-10-15 pounds, so you have to watch the dial, which I hate. At our Iowa altitude (under 1000' but close to it) the weighted gauges work very well and your product won't be over-processed.  Many University extension service offices are no longer checking pressure canner gauges either.  I also think that you have a tendency to do less “fiddling” trying to get the pressure right with a jiggler weight, and prevent some bad jar seals that way.
Presto 16 quart canner
with single rack and book

Check with manufacturers websites to see what their jar capacity is for different models, keep in mind that some jars are larger in circumference than others; my old Kerr jars are the smallest, Ball are in the middle and I usually have to put one less jar in when I use all Golden Harvest jars.  The stated canner capacity is for filling it with liquid, not jars.
I think that of these, I would buy the Presto first...it is fairly lightweight, the price is right, it’s a good size, I can use it on my glass-top range as well as a regular range, and it does a good job. I've never replaced the gasket but they are available and not expensive at our local True Value Hardware.   Our local Walmart was out when I wanted this canner and they shipped it to my door without shipping charges.  I see that this year, it is about the same price as I paid several years ago.
The All-American is great...but it's expensive, heavy to lift, and more complicated to use, with the screw-down seals, etc. You have to oil the sealing surfaces to keep it from locking on...some folks have had trouble with that. It doesn't have heat-proof handles. That said, it will probably last forever, and it has both a weighted gauge and a dial, and doesn't have a gasket that needs to be replaced.  I especially like the smallest size for smaller canning jobs.
All American handle
and screw-down detail
The Mirro has a gauge that spews rust...not as good as the older model I had 15 years ago, and I couldn't recommend it because of that.  I know of several other people who have had the same experience with their newer Mirros.
All of these newer pressure canners work on my glass-top stove as well as my previous types of stoves.
I don’t know that I would buy a large 23 quart canner to double stack jars on a glass top range – that’s a lot of weight when full.
I had my first pressure canner for years until I passed it on thinking I was through canning...big mistake on my part!  They last forever, and with a little care, they don’t cost much after the first investment.
I think you will enjoy pressure canning...it's a hobby that saves money if you garden or hunt or raise your own meat and poultry (or even buy larger amounts on sale) and it's satisfying to just open that jar of meat or soup or stew for dinner without thawing and to see all those full jars on your shelves.