Family Favorites...Blue Ribbon Lemon Bars


This recipe is one I found in “Our Iowa Magazine Feb/Mar 2012".  Of course, it’s one of our favorite magazines.  This is the absolutely best recipe I have ever found for lemon bars, and I have made it often already. I think it’s the glaze instead of powdered sugar on top.  The contributor explained they are best if prepared a day ahead so lemon flavor develops and she's right.  My husband thinks that's why they are so good - he says they aren't nearly as good the first day.
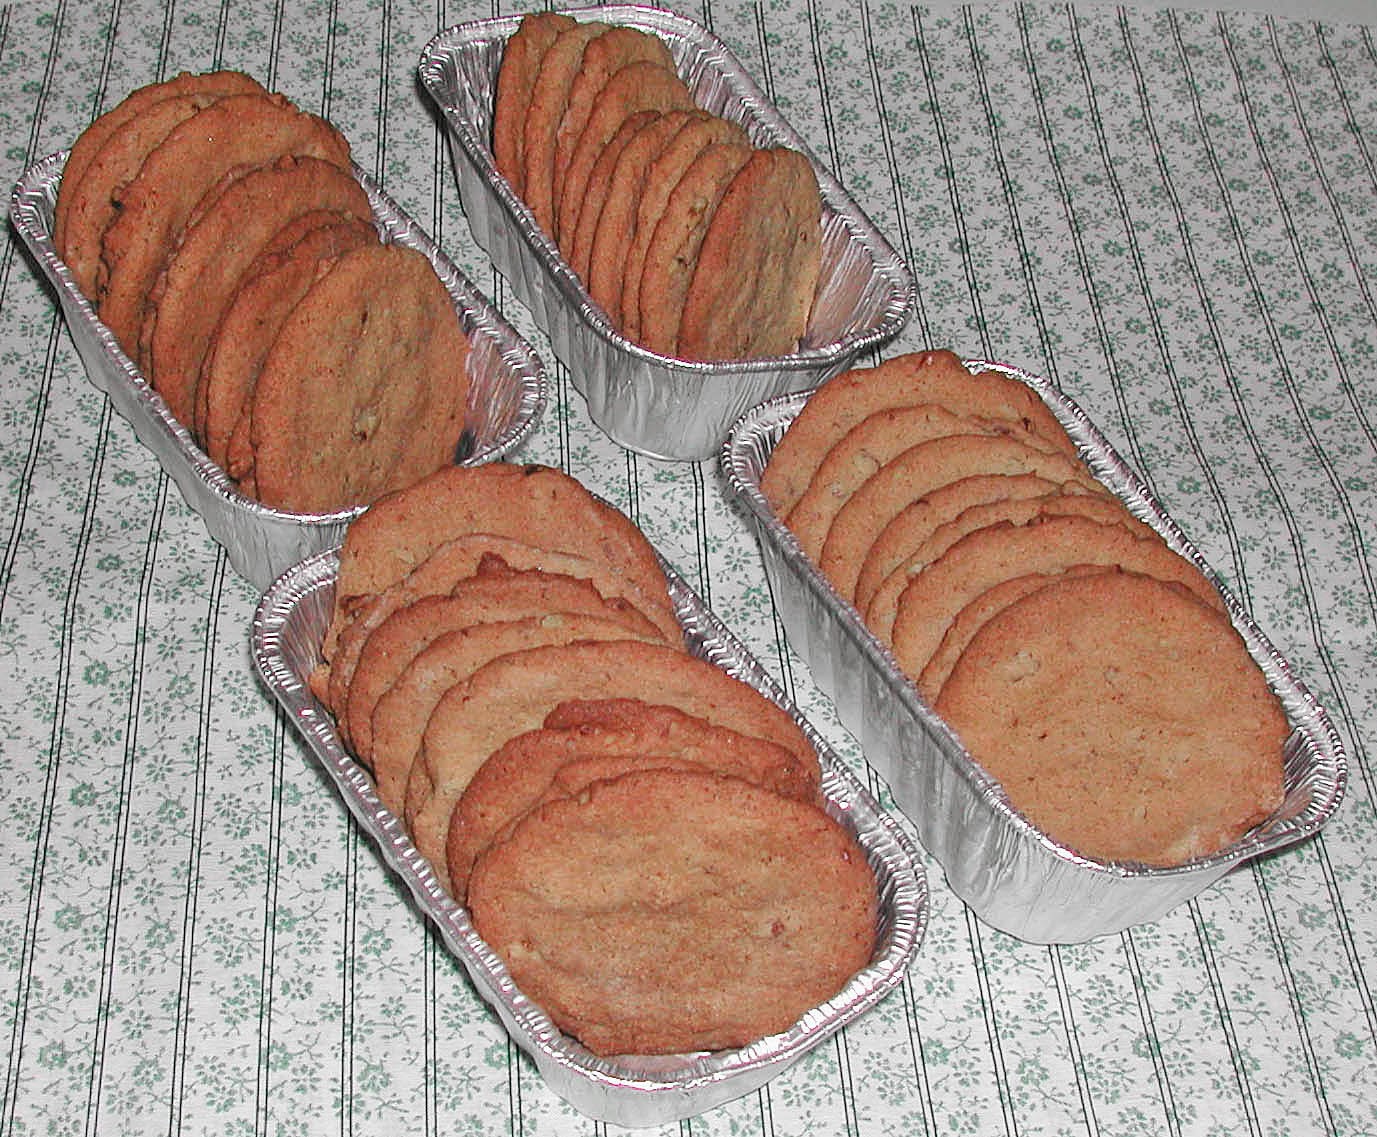
Chill after cutting to make them easier to handle.  They freeze well too.  One lemon is enough if it’s a large one.   If I have enough, I add any remaining lemon rind to the glaze.                
Blue Ribbon Lemon Bars  
                        Crust:
  1             Cup  Flour, All-purpose -- 4 1/2 ounces
     1/4      Cup  Powdered Sugar – 1 ounce
     1/8      Teaspoon  Salt
     1/2      Cup  Butter -- cold, 1 stick
                        Filling:
  1             Cup  Sugar – 6 ounces
  2             Tablespoons  Flour, All-purpose
     1/2      Teaspoon  Baking Powder
     1/8      Teaspoon  Salt
  2             Large  Eggs -- beaten
  2             Tablespoons  Lemon Juice
  1             Teaspoon  Grated Lemon Peel
                        Glaze:
     1/2      Cup  Powdered Sugar -- 2 ounces
  1             Tablespoon  Lemon Juice
  1             Tablespoon  Butter -- melted
 Preheat oven to 325°.  Prepare 8" square pan, grease or grease and line with parchment paper.
Combine flour, powdered sugar and salt.  Cut in butter until crumbs form.  Press into prepared pan and bake at 325° for 15 minutes.
Meanwhile, mix the filling ingredients.  Spread over crust.  Bake 25 minutes longer.  Cool completely.
In a small bowl, mix the glaze ingredients until smooth.  Spread evenly over filling.  Cut into small bars - 4 x 8. 
32 Bars
Per Serving: 85 Calories; 4g Fat (37.5% calories from fat); 1g Protein; 13g Carbohydrate; trace Dietary Fiber; 22mg Cholesterol; 62mg Sodium.  Exchanges: 0 Grain(Starch); 0 Lean Meat; 0 Fruit; 1/2 Fat; 1/2 Other Carbohydrates.

Spiced Pear Upside-Down Cake


 Sue suggested I try this recipe and we are so glad she did. The Taste of Home online 2013 web site has some good recipes and this one is excellent. Like gingerbread and pears? What an inspired idea. Easy to make, uses seasonal ingredients for the fall and everyone raved about how good it was. This is a recipe I will make many times for my family and friends. This is a variation on pineapple-up-side down cake, but much better we thought. You could serve it with ice cream, but great without anything added. We ate it warm and cold and it was so good either way.
Spiced Pear Upside-Down Cake
The flavors of fresh, sweet pears and gingerbread blend beautifully in this intriguing variation on pineapple upside-down cake.
9 Servings        Prep: 25 minutes.         Bake: 35 minutes. + cooling
Ingredients
1/2 cup butter, melted
1/2 cup coarsely chopped walnuts (pecans, etc)
1/4 cup packed brown sugar
2 large pears, peeled cored and sliced
1/2 cup butter, softened
1/3 cup sugar
1 egg
1/3 cup molasses
1-1/2 cups all-purpose flour
3/4 teaspoon ground ginger
3/4 teaspoon ground cinnamon
1/2 teaspoon salt
1/2 teaspoon baking powder
1/4 teaspoon baking soda
1/2 cup warm water
Ice cream, optional
Directions
Pour melted butter into a 9-in. square baking pan; sprinkle with nuts
and brown sugar. Arrange pears over nuts.
In a large bowl, cream softened butter and sugar until light and
fluffy. Beat in egg and molasses. Combine the flour, ginger,
cinnamon, salt, baking powder and baking soda; add to creamed
mixture alternately with water, beating well after each addition.
Spread batter over pears. Bake at 350° for 35-40 minutes or until
a toothpick inserted near the center comes out clean. Cool for 10 minutes before inverting onto a serving plate. Serve warm with ice cream if desired.

Yield: 9 servings.

Make It Yourself...Simple White Bread Buns or Rolls

Clockwise Top L: Dinner rolls with seeds,
Onion Hamburger Buns,  Half Recipe of Buns and a Braided Loaf
Egg wash and dried onions 
The simple white bread recipe we have been using is great for rolls or buns.  Its really the only bread recipe you ever need!
You can stock your freezer with a variety of dinner rolls and sandwich buns from the same recipe.
If you want a more nutritious dough, add a tablespoon or two of wheat germ or bran, or a tablespoon of each to the measuring cup before adding the flour.              
Simple White Bread Buns or Rolls
  6 ¼    Cups  Flour, All-purpose -- 1# 12 ounces
  3        Tablespoons  Sugar
  2        Packages  Instant, rapid rise or bread machine Yeast
  2        Teaspoons  Salt
  1 ½    Cups  Water -- 120°-130°
     ½    Cup  Milk -- 120°-130°
  2        Tablespoons  Butter, lard -- softened
In mixer bowl, combine 2 1/2 cups flour, sugar, yeast and salt.  Heat water, milk and fat  until very warm (120-130°).  Gradually add mixture to dry ingredients; beat 2 minutes at medium speed of electric mixer, scraping bowl occasionally.  Add 1/2 cup flour; beat 2 minutes at high speed, scraping bowl occasionally.  Add enough remaining flour to make a soft dough.  Change to dough hook and knead on speed 2 for 6 minutes.
Brat and Hamburger Buns 
Cover bowl tightly; let rise 10 minutes.
Shape as desired, let rise and bake.
Rolls:  Use 1/2 of dough.  Shape into 8-12 equal pieces and place in greased 8" pan.  Cover; let rise until doubled, 20-30 minutes. (Fill a 13 x 9" pan with the whole recipe).
For dinner rolls:  Top with egg mixed with 1 tablespoon water; sprinkle with sesame or poppy seeds.
For onion rolls:  Top with egg mixed with 1 tablespoon water; sprinkle with 2 tablespoons instant minced onion.
For either, bake at 375° for 20-25 minutes, until done.  Cover with foil during last 5 minutes to prevent excess browning if necessary.
Remove from pan; let cool on wire rack.
For hamburger or brat buns:  Shape 3 ounce portions of the dough into rounds or oblong buns, flattening them.  Use half-sheets or jelly roll pans; I line mine with parchment paper or grease the pans.  (I used the egg wash from the dinner rolls on these).  Bake for 20-25 minutes.  Half of the recipe will make 8 buns; I often make 8 of each and slice and freeze them for grilling in the summer.

Basic Oats Mix Biscuits, Muffins, Applesauce Bread and Dumplings

Here are the recipes that the “Culinary Institute the Budget Cookbook" gives with their recipe for Basic Oats Mix (I included the recipe at the bottom).  I have made both the muffins and biscuits and found them to be both quick and tasty.
I included the recipes for the bread and dumplings, although I haven’t tried them yet.

Oatmeal Muffins
  2              cups  plus 2 tablespoons Oat Mix  
     1/4       cup  Sugar
  1              cup  Milk
  1              large  Egg -- beaten
FOR MUFFINS: 
Combine oats mix and sugar in a bowl.  Add milk and egg; stir until just blended.
Fill 12 greased 2 1/2" muffin-pan wells 2/3 full.
Bake at 400° about 20 minutes, or until golden brown.
Cost:  about 96¢ per dozen or 8¢ per muffin

Oatmeal Biscuits
  2               cups  Oat Mix
     2/3        cup  Cold Milk
FOR BISCUITS: 
Combine oats mix and milk in a bowl; stir with a fork to a soft dough.  Let the dough set in the bowl to absorb some of the liquid into the oats, about 5-10 minutes.
Turn dough onto a lightly floured surface.  Knead with fingertips 10 times.  Roll out 1/2" thick and cut with a floured 2" cutter.  (Be sure to cut straight down without twisting, to help your biscuits rise and get that characteristic “split”.)
Put on ungreased cookie sheet. 
Bake at 450° 10-12 minutes.
Biscuits cost 54¢ per dozen or 4 1/2¢ per biscuits.

Quick Applesauce Bread
  2 1/4    Cups  Oat Mix
  1           Cup  Sugar
  1           Teaspoon  Cinnamon
  1           Cup  Applesauce -- sweetened
  1           Large  Egg
     1/2    Cup  Milk
     1/2    Cup  Raisins – optional
FOR APPLESAUCE BREAD: 
Combine oats mix, sugar and cinnamon in a bowl.  Add applesauce, egg, milk, and raisins; stir until mixed.
Turn batter into a greased and floured 8 1/2 x 4 1/2 x 2 1/2" loaf pan.
Bake at 350° for 55 to 60 minutes.
Remove from pan and cool completely on a rack before slicing.  1 loaf

Fluffy Dumplings
  2           Cups  Oat Mix
  1           Cup  Milk

FOR DUMPLINGS:
Thoroughly combine oats mix and milk.  Spoon onto boiling stew. (Try to drop them on the meat or vegetables to keep them from getting too soggy).  
Cook, uncovered, over low heat 10 minutes; cover and cook 10 minutes longer.  10-12 Dumplings.

Basic Oats Mix
  6        Cups  Flour, All-purpose (about 1 pound 11 ounces)
  4        Tablespoons  Baking Powder
  4        Teaspoons  Salt
  1 1/3 Cups  Shortening (about 9.33 ounces)
  2        Cups  Oats -- quick or old fashioned, uncooked (about 6 ounces)
Sift flour, baking powder and salt together in a large bowl.  Cut in shortening until mixture resembles coarse crumbs.  Stir in oats.
Store in a cool, dry place until ready to use.
Makes enough for 4 batches muffins, biscuits, dumplings or applesauce bread.
Cost:  $1.67 per full recipe or 17¢ per cup if you get 9 3/4 cups from the recipe.

Yield:  "9 3/4 Cups"

Culinary Institute the Budget Cookbook" 1975

Basic Oats Mix

Here’s an interesting take on homemade biscuit mix from the “Culinary Institute the Budget Cookbook” from 1975, a book I picked up at our local thrift shop. 
Tomorrow, I’ll give your some of the recipes to use this mix.  I used the old-fashioned oats, but you can also use quick-cooking oats. 
               
                              Basic Oats Mix
  6        Cups  Flour, All-purpose (about 1 pound 11 ounces)
  4        Tablespoons  Baking Powder
  4        Teaspoons  Salt
  1 1/3 Cups  Shortening (about 9.33 ounces)
  2        Cups  Oats -- quick or old fashioned, uncooked (about 6 ounces)
Sift flour, baking powder and salt together in a large bowl.  Cut in shortening until mixture resembles coarse crumbs.  Stir in oats.
Store in a cool, dry place until ready to use.
Makes enough for 4 batches muffins, biscuits, dumplings or applesauce bread.
Cost:  $1.67 per full recipe or 17¢ per cup if you get 9 3/4 cups from the recipe.

Yield:  "9 3/4 Cups"

Sunday in Iowa


Lovely Fall color on a tree between New Sharon and Pella Iowa. There was a Jack O lantern under the tree.

Family Favorites Spiced Sherry Apple Pie


  I used the recipe for Spiced Sherry Apple Pie today from the Fannie Farmer Baking Book. It was quite good. It will not replace my normal apple pie recipe, but as a change it is good. I rarely make a two crust pie, so that was a small change in itself.
  The next time I make it, I will cut back on the amount of sherry or add a little more flour as it was juicier than I would have liked. The flavor was good, however. 
  I do think for this recipe you need to use a sweeter apple and one that will hold its shape. I used Honey Crisp as they are a favorite of ours when they are in season. I also used Cream Sherry as opposed to plain Sherry, either should work, keeping in mind the Cream Sherry is a sweeter Sherry.
Spiced Sherry Apple Pie
Pastry for a 9 inch two crust pie
½ cup sherry (not cooking sherry)
1 tablespoon fresh lemon juice
1 rounded tablespoon flour
½ teaspoon cinnamon
¼ teaspoon ground allspice
⅛ teaspoon ground cloves
¼ teaspoon salt
½ cup sugar
7 apples, peeled, cored, and sliced (Honey Crisp or Golden Delicious)
  Line a 9 inch pie pan with half the rolled out dough. Roll the remaining dough and set it aside.
  Combine the sherry, lemon juice, flour, cinnamon, allspice, cloves, salt and sugar in a heavy-bottomed saucepan. Mis until smooth and well blended. Add the apples and toss so they are coated with the spice mixture. Put on medium heat and cook until the mixture boils. Stir and let boil for 1 minute. Cover and remove from heat. Let cool to room temperature.
 Preheat the oven to 400°.
  Pile the apple mixture into the dough-lined pan. Place the top crust over the filling. Crimp the edges and cut vents in the top.
  Bake for 15 minutes at 400°, reduce heat to 325° and bake for 45 minutes more,
Serve warm or cold.
  We enjoyed it warm with ice cream.

Buttermilk Rye Bread in a Food Processor

We’ve been trying out rye bread recipes, looking for that elusive “sandwich” style rye bread that would still have that deli rye texture and flavor.  This one adapted from the “Red Star Centennial Bread Sampler" from 1981 is just right.  The buttermilk gives it a little of that tang, the texture is firm and nice, and the caraway seeds and molasses give it an old-fashioned flavor. 
This is a sticky dough, don’t be tempted to add too much flour; after it rests, the lard makes it a very easy-to-handle dough. Here’s a food processor version of a very tasty rye bread loaf.  You can also make this loaf on the dough cycle of your bread machine and then shape into a loaf and bake in your oven.  
                  
                       Buttermilk Rye Bread 1 Loaf
  1         cup  Rye Flour -- 3 1/2 ounces
  1         cup  Whole Wheat Flour -- 4 ounces
  1 1/4   cups  Bread Flour -- 4 3/4 ounces
  1         package  instant yeast -- or rapid rise yeast
  1         tablespoon  wheat germ
     3/4   tablespoon  caraway seeds
  1 1/2   Teaspoons  salt
     3/4   cup  buttermilk
     1/4   cup  water
  2        Tablespoons +2 teaspoons  molasses  
  2        Tablespoons  lard (or butter or shortening)
In food processor work bowl, combine all rye flour, whole wheat flour, bread flour, yeast, wheat germ, caraway seed and salt; mix well.
Heat buttermilk, water, molasses and lard until warm (120-125°). Add to flour mixture through feed tube slowly so flour can absorb liquids and process until dough pulls away from sides of work bowl.  Knead 1 minute after mixture forms a ball.
Cover work bowl, let rest in a warm place 10 minutes.
Shape into a loaf for 8 1/2" x 4 1/2" or 10" x 4" pans. Place in greased pan, let rise in warm place until doubled, about 35 minutes.
Bake at 375°for 35-40 minutes until loaf read 200°-210° on an instant read thermometer. You may have to cover the loaf with foil or parchment paper the last 10 minutes to keep it from getting too brown on top.
Remove from pans and cool on a wire rack.
Yield:  "1 loaf""

Buttermilk Rye Bread

We’ve been trying out rye bread recipes, looking for that elusive “sandwich” style rye bread that would still have that deli rye texture and flavor.  This one adapted from the “Red Star Centennial Bread Sampler" from 1981 is just right.  The buttermilk gives it a little of that tang, the texture is firm and nice, and the caraway seeds and molasses give it an old-fashioned flavor. 
This is a sticky dough, don’t be tempted to add too much flour; after it rests, the lard makes it a very easy-to-handle dough.  It’s a good choice for using your heavy-duty mixer, so you don’t knead in too much flour.  The directions for this bread are mine…to make it quicker and easier to make.  I cut the time from close to 3 hours to a little over 1 ½ hour using instant yeast and my heavy duty mixer.  Check out our mixer bread information HERE.  Remember, you can also make this recipe by hand too, the way I did for years.
We’re using ours for patty melt and Reuben sandwiches.
Buttermilk Rye Bread
  2        cups  rye flour (about 7 ounces)
  2        cups  whole wheat flour (8 ounces)
  2        packages  instant yeast -- or rapid rise yeast
  2        tablespoons  wheat germ
  1 1/2 tablespoons  caraway seeds
  1        tablespoon  salt
  1 1/2 cups  buttermilk
     1/2 cup  water
     1/3 cup  molasses
     1/4 cup  lard (or butter or shortening)
  2 1/2 cups  bread flour  (about 9 ½ ounces)
In large mixing bowl, combine all rye flour, whole wheat flour, yeast, wheat germ, caraway seed and salt; mix well.
Heat buttermilk, water, molasses and lard until warm (120-125°).  Add to flour mixture and blend at low speed until moistened.  Beat 3 minutes at medium speed.  Gradually add bread flour.
Change to dough hook and knead 6 minutes, or knead 8 minutes by hand.  Cover bowl tightly, let rest in a warm place 10 minutes.
Divide into 2 parts, (about 1# 10 oz. each).  Shape each into a loaf for 8 1/2" x 4 1/2” or 10" x 4" pans.  Place in greased pans, let rise in warm place until doubled, about 35 minutes.
Bake at 375° for 35-40 minutes until loaves read 200°-210° on an instant read thermometer.  You may have to cover the loaves with foil or parchment paper the last 10 minutes to keep it from getting too brown on top.
Remove from pans and cool on a wire rack.
Yield:  "2 loaves"
Per Serving: 95 Calories; 2g Fat (16.7% calories from fat); 3g Protein; 17g Carbohydrate; 1g Dietary Fiber; 2mg Cholesterol; 171mg Sodium.  Exchanges: 1 Grain (Starch); 0 Vegetable; 0 Non-Fat Milk; 1/2 Fat; 0 Other Carbohydrates.

Make It Yourself...Simple White Bread Loaves and Pizza Crusts

Small pizzas made from 1/4 of dough each;
braided loaf in a 4 x 10" loaf pan from 1/2 recipe
All from the same batch of dough
This week we’re going to make simple white bread into bread pans, braided loaves or pizza crusts.  We like the flexibility of making whatever kind of bread we need from this great recipe just like Grandma’s.  I often make half of the bread into a sandwich loaf and the other half into a braided loaf or pizza crusts.  I usually choose bread flour, because it develops more gluten and gives a nice, firm loaf.  If you don’t bake bread often, use all-purpose flour.
Check out our mixer bread information HERE.  Remember, you can also make this recipe by hand too, the way I did for years.
Sandwich loaves in 4 1/2" x 8 1/2" loaf pans

Simple White Bread
Yield:  "2 Loaves”
  6 ¼    Cups  Flour, All-purpose  or Bread -- 1# 12 ounces
  3        Tablespoons  Sugar
  2        Packages  Instant Yeast or Bread Machine Yeast
  2        Teaspoons  Salt
  1 ½    Cups  Water -- 120°-125°
     ½    Cup  Milk -- 120°-125°
  2        Tablespoons  Butter, oil or lard
In mixer bowl, combine flour, sugar, yeast, and salt.  Heat water, milk and butter until very warm (120-125°).  Gradually add mixture to dry ingredients; beat 2 minutes at medium speed of electric mixer, scraping bowl occasionally.  Change to dough hook and knead on speed 2 for 6 minutes.
Cover bowl with plastic wrap or a tight cover; let rise 10 minutes in a warm place. (No need to grease the pan or dough if you cover it tightly.)
Loaves: (1 1/2 pound) Roll 1/2 of dough to 12 x 7" rectangle.  Beginning at short end, fold like an envelope, in thirds, tightly.  Pinch ends and seal.  Place in greased 8 1 2 x 4 1/2" loaf pan or a 4" x 10" loaf pan, seam side down.  Cover, let rise in warm place until doubled in size, about 25 minutes.  Bake at 400° for 30 minutes. Remove from pan and cool on wire rack.
Braids:  Divide 1/2 of dough into 3 equal pieces (8 ounces each).  Roll into 16" rope.  Braid on greased baking sheet.  Cover, let rise until doubled, about 30 minutes.  Beat 1 egg with 1 tablespoon water; brush over braid.  Sprinkle with sesame or poppy seeds if desired.  Bake at 400° for 25 minutes until done.  Remove from pan and cool on wire rack.
Pizza:  Grease 14" or two  12" round pizza pans.  Roll 1/2 of dough and fit into prepared pans. Bake at 400° for 10 minutes, top with sauce and desired toppings, return to oven and bake 10-15 minutes more until done.

Cost per loaf:  51¢ with bread flour, 41¢ with all-purpose flour and butter.

Chile Garlic Green Cabbage


  For our vegetable tonight, I used up the cabbage I had in the refrigerator. Once again using the Cooking Light Jan/Feb 2014 issue for the recipe.   We thought it was quite good, made a nice change of pace and was quick to fix. All things considered this is a side I will fix again. Cabbage is usually quite inexpensive and we like cole slaw, but you can only eat so much of that as a side. I made half of the recipe and it was a great plenty for three of us. Bettie will take the serving that is left for lunch tomorrow. Served with baked potatoes and homemade chicken strips that was a easy supper. The potatoes and chicken strips baked in the oven leaving me free to make the cabbage dish.
Chile Garlic Green Cabbage 
Combine 4 teaspoons fresh lime juice, 4 teaspoons brown sugar, 2 teaspoons fish sauce and 1 teaspoon sambal oelek (I used chinese red chile sauce)* in a small bowl.
 Heat 1 tablespoon dark sesame oil in a large skillet over medium heat; Add 8 cups of sliced green cabbage to pan, cook 7 minutes or until lightly browned. Stir in brown sugar mixture; cook 4 minutes; stirring occasionally. Stir in ¼ cup of chopped fresh cilantro leaves if desired.
 *Since I did not have the sambal oelek, I add a pinch of powdered garlic with the sauce. You could add some minced fresh garlic also.

Pork Roast in Beer


 I often fix Boston Butt pork roasts in the winter. It warms up the house to have the oven on and smells so good when you come in out of the cold.
 That said, I was tired of using the same method to fix it so tried this recipe for pork roast shoulder in beer. Sue and I were raised in a largely German community so this recipe calling for dark beer and caraway seeds sounded good and it was.
 Spiced just right and so tender. The leftovers eaten cold were almost better than eaten hot. Marvelous gravy also. Really just right for a easy warming meal with not much work or dishes. Serve it with your favorite potato, we had boiled potatoes which was what we would have had growing up. A vegetable and you are all set.
Pork Roast in Beer
Prep: 15 minutes   Cook: 2 hours 45 minutes (includes making the gravy)
1 Tablespoon caraway seeds
Salt and Pepper
1 4 to 5 pound pork roast Shoulder  (Boston Butt)
3 Tablespoons vegetable oil
1 to 2 onions, chopped
1 carrot chopped
1 rib celery chopped
3 garlic cloves smashed and peeled
2 cans (14  ½ ounce) beef broth
1 bottle dark beer (I used Becks)
3 to 4 tablespoons flour or cornstarch to thicken gravy
 Preheat the oven to 425°. Mix the caraway seeds and salt and pepper (1 teaspoon each). Use to season the pork roast.
 In a medium, roasting pan (Dutch oven) heat oil and brown the roast on all side. Remove and add the chopped vegetables. Cook stirring till they start to caramelize. Add the smashed garlic and cook for 2 more minutes. Place roast back in pan, pour in beef broth, and pour the beer over the meat. Cover and bake in oven for 2 hours or until instant read thermometer reads 155°. Transfer meat to a platter, cover loosely with foil and let stand, Discard the chopped vegetables pressing out the liquid. Thicken the pan juices with the flour or cornstarch.  If using cornstarch stir it into cold water and then in to the liquid, If using flour stir into ¼ cup water to form a paste. Whisk the paste into the pan juices and cook till until thickened. Season with salt and pepper if desired.

Sunday in Iowa

Acres of Stover...
Baled cornstalks used in the hog houses 
as an economical and more environmentally-friendly substitute for big lagoons

Family Favorites Schrafft's Butterscotch Cookies


  This cookie recipe from the Fannie Farmer Baking Book states that the cookies are scaled down from a recipe used by Schrafft’s in New York.  I have never tasted theirs but these are a very good cookie. Simple, nutty and crisp. It is hard to beat this recipe.
  It made a few more than the recipe called for as I made the balls with my cookie scoop. Much better cold than still warm, though they were excellent that way also.
  They reminded me of a refrigerator cookie but better as they are so thin and crisp.
Very easy to make and I hope you enjoy them as much as we did.
Schrafft”s Butterscotch Cookies
 2 tablespoons butter at room temperature
¾ cup vegetable shortening at room temperature
1 ¼ cup packed brown sugar
1 large egg
2 tablespoons nonfat dry milk
1 tablespoon vanilla
1 ¾ cups flour
½ teaspoon baking powder
½ teaspoon salt
1 cup finely chopped nuts
  Preheat the oven to 375°F. Grease or use parchment paper on cookie sheets.
  Combine the butter and shortening in a bowl and beat for a few seconds. Add the sugar and beat until creamy. Add the egg, dry milk, and vanilla and beat until light. Add the flour mixture to the butter mixture and blend. Stir in the nuts by hand.
  Drop heaping tablespoons of dough 2 inches apart onto the cookie sheet. Dip the bottom of a glass in flour and use it to press the dough down in a circle. If the dough stick a little to the bottom the the class, just pat any bits back into the circle of dough. Dip the glass into the flour again for each cookie.
  Bake the cookies 7 to 10 minutes or until golden brown. Remove from the oven and gently lift the cookies onto a rack. Cool and store in an airtight container.

Old Fashioned Three Flour Bread

Here’s an old-fashioned bread recipe that I’ve modernized using a heavy-duty mixer and instant yeast.  I use a medium rye flour, and bread flour, along with whole wheat flour.  I have to say, the rye is not really noticeable for taste, but it makes a nice firm-textured bread for sandwiches or toast, and we had some when we sliced it with sorghum from our local sorghum producer, Maasdam’s.  I use lard from our local locker plant, because it isn’t hydrogenated.  Otherwise use butter or salad oil. 
Check out our mixer bread information HERE.  Remember, you can also make this recipe by hand too, the way I did for years.            
I braided one loaf and made another in a 4” x 10” pan for smaller slices this time.  Of course, you can make this bread by hand as well.  This bread gets a thumbs-up at our house.
Old Fashioned Three Flour Bread
  4        Cups  Bread Flour -- 1 pound 4 ounces
  1 ½    Cups  Whole Wheat Flour -- 6 ounces
     ½    Cup  Rye Flour -- 2 ounces
     ½    Cup  Brown Sugar -- 4 ounces packed
  2        Tablespoons  Sugar
  2        Packages  Instant Yeast
  2        Teaspoons  Salt
  2        cups  milk
     ½    Cup  Water
  3        Tablespoons  Lard -- melted and cooled (or butter or oil)
IN a mixing bowl, combine 2 cups all-purpose flour, whole wheat flour, rye flour, sugars, yeast and salt.  In a saucepan, heat the milk and water to 120-125°.
Add to dry ingredients; add cooled lard and beat until smooth.  Stir in enough remaining all-purpose flour to form a soft dough.  Change to a dough hook and knead 6 minutes or knead by hand 8 minutes.  Cover bowl tightly and let rest in a warm place 10 minutes.
Punch down dough, turn onto a lightly floured surface; divide in half, divide each half into 3 ropes; about 15" long.  Braid 3 ropes and place into a greased 9 x 5 x 3" loaf pan.  Repeat with second loaf.
Cover and let rise 25-30 minutes.  Bake at 375° for 30-35 minutes, or until 200° on an instant-read thermometer.  Remove from pans to wire rack to cool.
If desired, mix an egg yolk with 1 teaspoon water and brush on loaves just before baking.  If needed, cover lightly with a piece of foil or parchment paper to prevent overbrowning the last 10 minutes of baking.
Yield:  "2 Loaves"

Make It Yourself...Simple White Bread

  I’ve seen lots of recipes for “one-hour” homemade bread that produces loaves that just don’t have the good gluten formation of regular bread.  They depend on a larger-than-usual amount of yeast, and skip the first rise in the bowl.  They make a somewhat crumbly too-soft loaf that lacks structure.
We much prefer this simple white bread recipe that adds only 10 minutes for the first rise, but uses less of the expensive yeast and makes a perfect loaf.  I made these loaves from getting out the mixer bowl to getting the loaves from the oven in less than 90 minutes, and most of that time was simply waiting for rising and baking.  You don’t even need a bread pan; you can bake free-form loaves on a baking sheet. 
Check out our mixer bread information HERE.  Remember, you can also make this recipe by hand too, the way I did for years.
My husband thinks this recipe tastes just like his mother’s bread – it tastes like our Mom’s too!  Easy enough to make every week…delicious, versatile, just great bread that says “Homemade”.

                            Simple White Bread
Yield:  "2 Loaves”
  6 ¼    Cups  Flour, All-purpose  or Bread -- 1# 12 ounces
  3        Tablespoons  Sugar
  2        Packages  Instant Yeast or Bread Machine Yeast
  2        Teaspoons  Salt
  1 ½    Cups  Water -- 120°-125°
     ½    Cup  Milk -- 120°-125°
  2        Tablespoons  Butter, oil or lard
  • In mixer bowl, combine flour, sugar, yeast, and salt.  Heat water, milk and butter until very warm (120-125°).  Gradually add mixture to dry ingredients; beat 2 minutes at medium speed of electric mixer, scraping bowl occasionally.  Change to dough hook and knead on speed 2 for 6 minutes.
  • Cover bowl with plastic wrap or a tight cover; let rise 10 minutes in a warm place. (No need to grease the pan or dough if you cover it tightly.)
  • Shape 2 loaves, 1 1/2 pounds each, into rounds or long loaves, or into greased 9x5" loaf pans.  Place your free-form loaves on a half-sheet (13 x 18" pan), greased or lined with parchment. 
  • Cover, let rise in warm place until doubled in size, about 25 minutes. While dough is rising, preheat your oven to 375°.
  • If desired, beat 1 egg yolk with 1 teaspoon water; brush over raised loaves.  Sprinkle with sesame or poppy seeds if desired.  Slash loaves with a sharp knife, (lightly spray your knife with cooking spray to prevent dragging). 
  • Bake at 375° for 28-30 minutes. (Cover with foil during last 5 minutes to prevent excess browning if necessary.)  Loaves should read 200° with an instant read thermometer. Remove from pan and cool on a wire rack.


Cost per loaf:  51¢ with bread flour, 41¢ with all-purpose flour and butter.